
How to import external sources to an Rhapsody Model
Sometimes it is necessary to use data-types and/or functions defined in header files given by an other developer. In this case the best way is to import these header files as external files to the working model. For external files no code is generated.
In the following article two models are mentioned. A working model with whom the application is developed and an import model to perform Reverse Engineering.
1 – Initial import
To import external sources to a Rhapsody model Reverse Engineering can be used. In the following steps the import process is described.
-
- Open Rhapsody (depending on the language of the given source files choose Rhapsodoy in C or Rhapsody in C++)
- Create a new project (the import model).
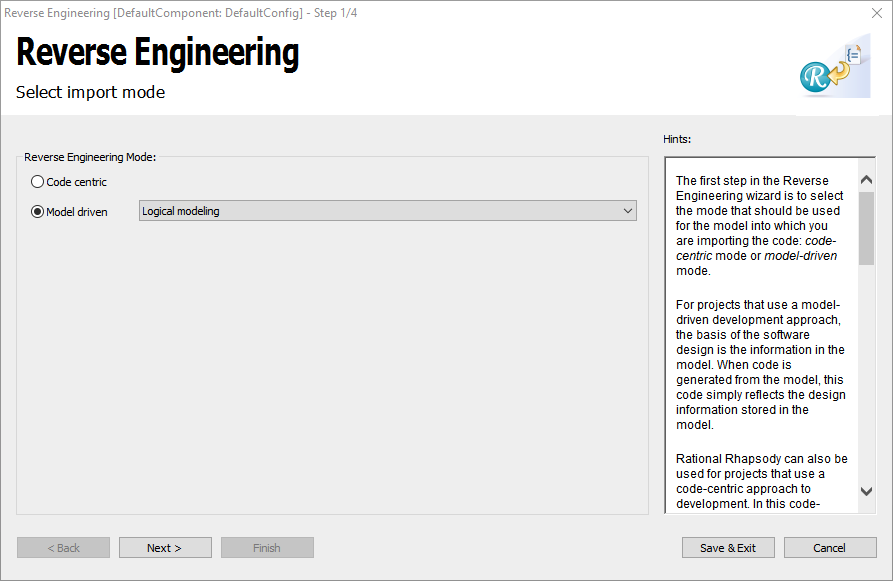
- Open Tools > Reverse Engineering
- Choose Logical Modelling
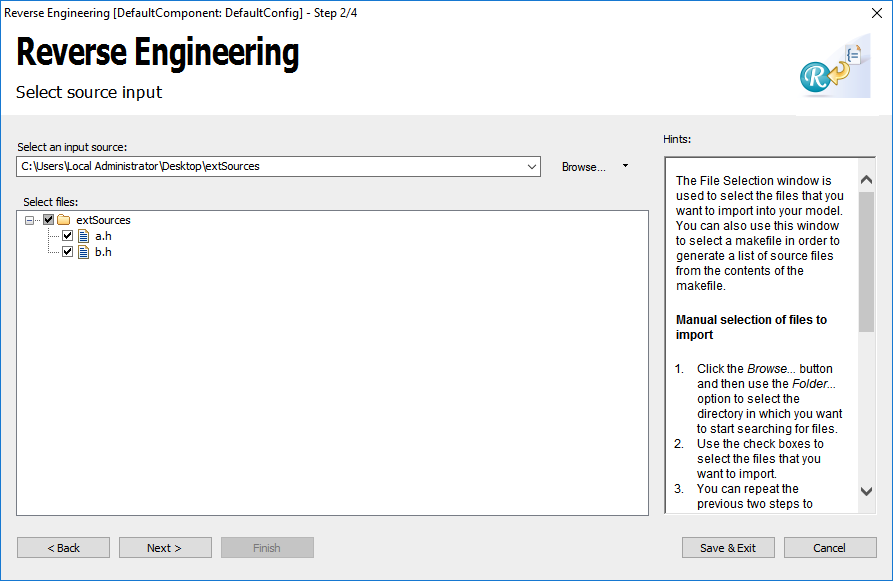
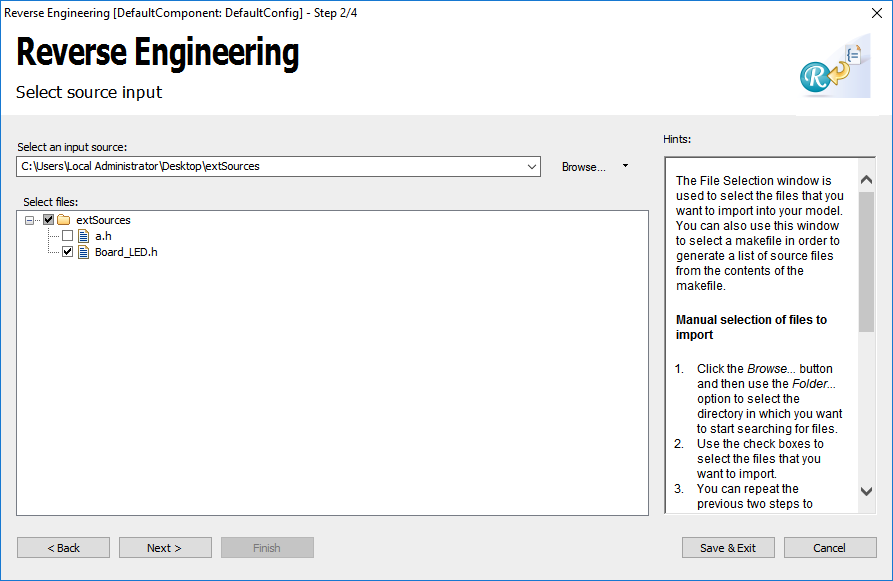
- Browse to file which have to be imported and select them.
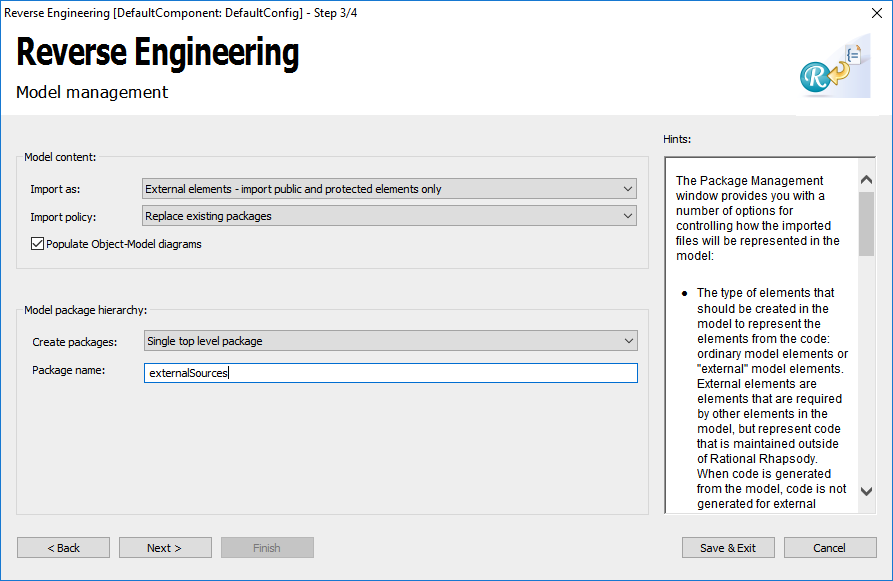
- Click Next and set External elements and Single top level package.
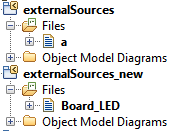
- Import files with Next and Finish. After that you should get something like in the next figure
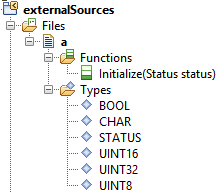
At the package icon the small yellow arrow shows that no code is generated for the content of this package.
- (Optional) If the sources are in C and should be used in an C++ model (the working model) the language of the unit has to be changed to C++. With a right click of the package open the context menu and choose Unit > Edit Unit… and open the following window.
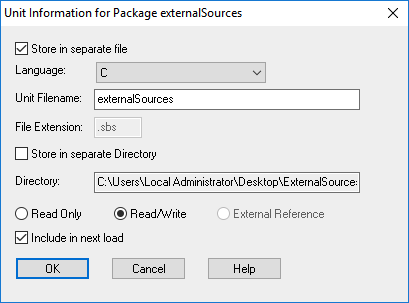 Switch the language to C++ and click OK.
 - Close the import model and open the working model in which the sources should be used.
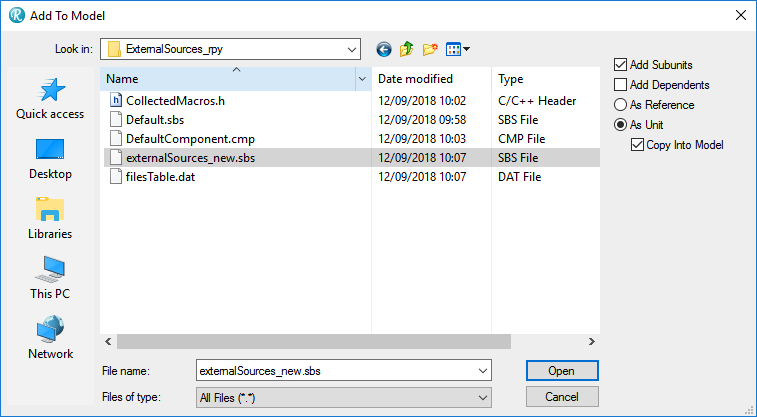
- Choose File > Add to model… and browse to the created package.
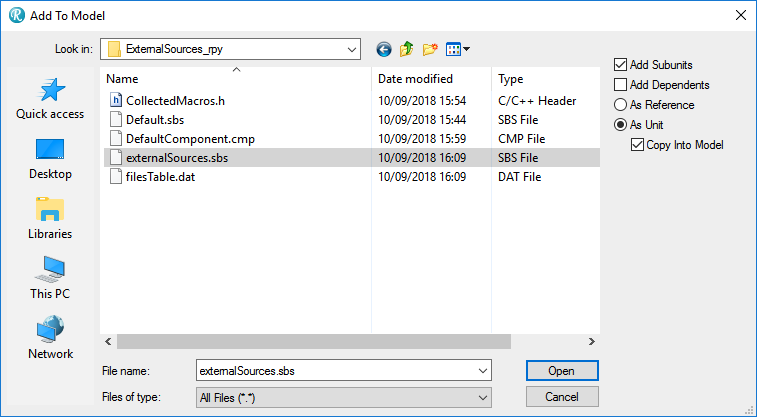 As options choose As Unit and Copy Into Model.
 -
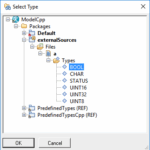
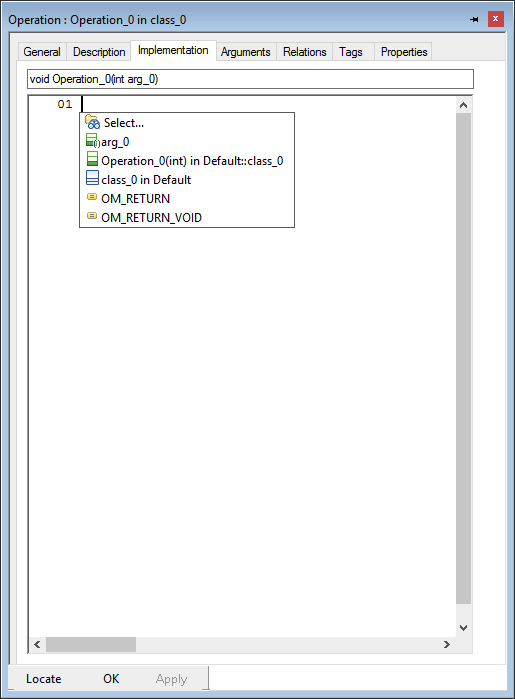
Now the data-types and functions can be referenced in the working model. In the following picture some samples of usage are shown.
Select return type
or argument type
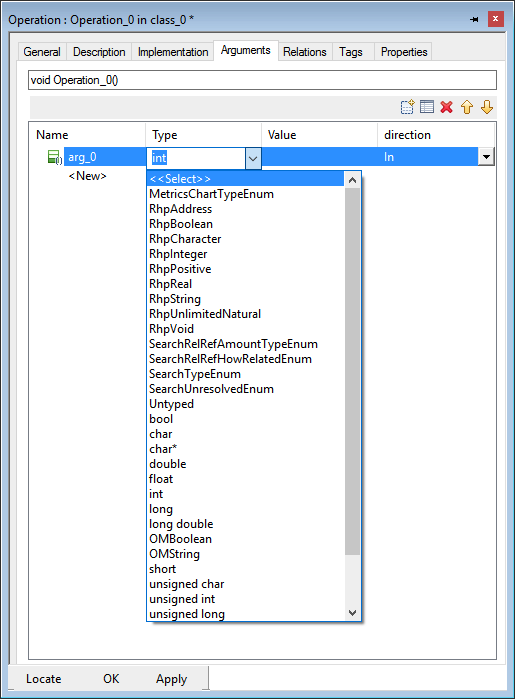
or with the shortcut Ctrl + Space in the implementation.
-
Attention
When executed again, other GUID are assigned to the data types and functions. As a result, they are no longer recognised in the working model and must be reassigned.
If changes occur to the imported sources, they must be manually added to the imported package.
To prevent accidental overwriting, it is recommended to delete the import model used for reverse engineering after importing the package into the working model
2 – Add additional header files
If new header files has to be imported to the externalSources package proceed as follows:
- Open Rhapsody (depending on the language of the given source files choose Rhapsodoy in C or Rhapsody in C++)
- Create a new project (the import model).
- Open Tools > Reverse Engineering
- Choose Logical Modelling
- Browse to file which have to be imported and select them.
- Click Next and set External elements and Single top level package. Choose another package name (externalSources_new) than in the working model.

- Import files with Next and Finish. After that you should get something like in the next figure.
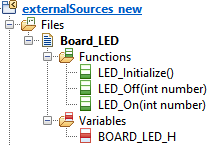 At the package icon the small yellow arrow shows that no code is generated for the content of this package.
 - (Optional) If the sources are in C and should be used in an C++ model (the working model) the language of the unit has to be changed to C++. With a right click of the package open the context menu and choose Unit > Edit Unit… and open the following window.
 Switch the language to C++ and click OK.
- Close the import model and open the working model in which the sources should be used
- Choose File > Add to model… and browse to the created package.
- Now the new file can be moved to the externalSources package. It is easier to handle only one external package.
- After that you should get something like in the next figure.
- Now the new file can be moved to the externalSources package. It is easier to handle only one external package.
- Following video shows step 9 to 13:
[wpvideo aFGPYz13]
That was it! Thanks to Dennis Koelbel for creating this article and video!
Happy Modeling with Rhapsody!
Walter van der Heiden (wvdheiden@willert.de)
Hi,
Thank you for the helpful information.
I’m trying to Reverse Engineer C (IBM Rational® Rhapsody® 8.4) code to visualize its model, I go with the same steps but I have two differences:
* The first is that, in “Reverse Engineer mode”, I have the “code centric without code generation” and “model driven” options.
* Secondly, when I finish the steps, I see “Roundtripping has been completed.” log. And the results of step 7 are not product.
I’m wondering if I have to take care of an additional step or settings.
I’m looking forward to your reply
your sincerely,
Maziar